Canopy Modification
The battery for your 150X needs to “snap” into place when you insert it before flight … if your battery isn’t fully seated, it will likely come loose, either at startup or during flight.
Unfortunately, two out-of-the-box problems combine to make this difficult. First, if you watch the battery connector closely while inserting a battery, you will see that it flexes slightly, preventing the battery from snapping into place. Second, the vents in the stock 150X canopies (both plastic and fiberglass) prevent you from providing any support for the battery connector with a finger:
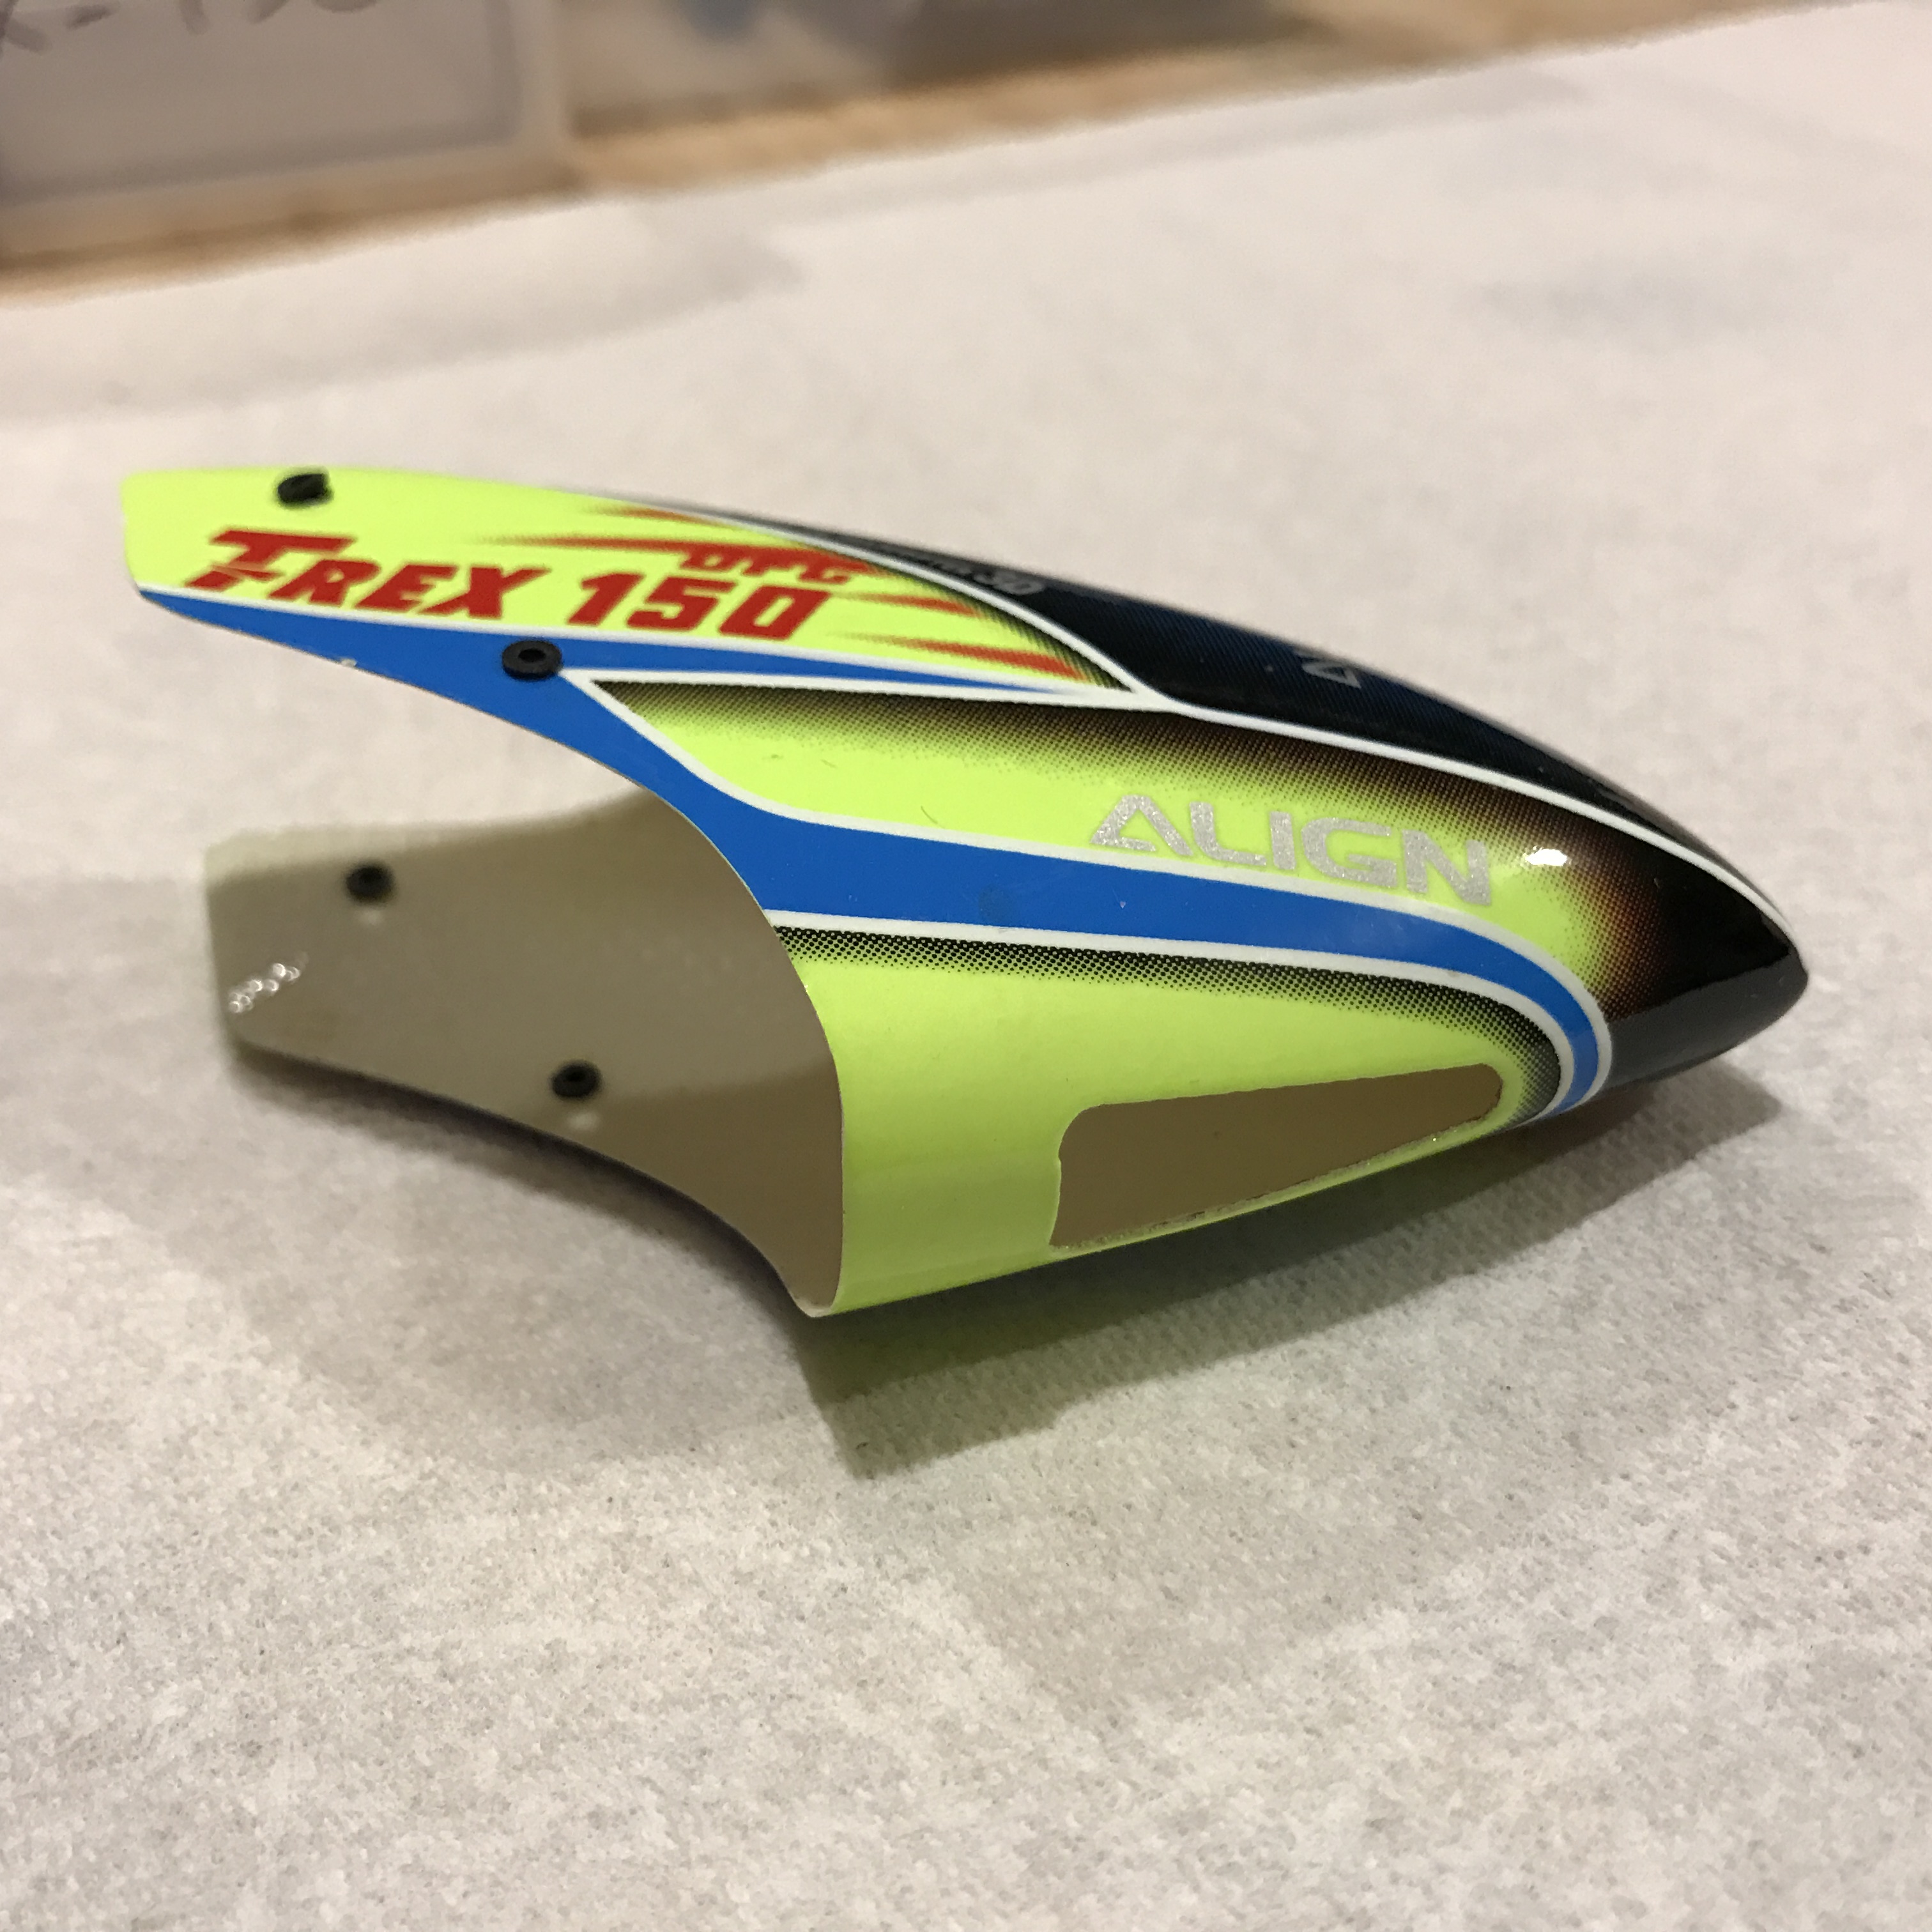
This makes it difficult-to-impossible to fully seat the battery. Fortunately, there are two ways to address this. The first is to modify the canopy so that you can support the connector with a finger as you snap the battery into place:
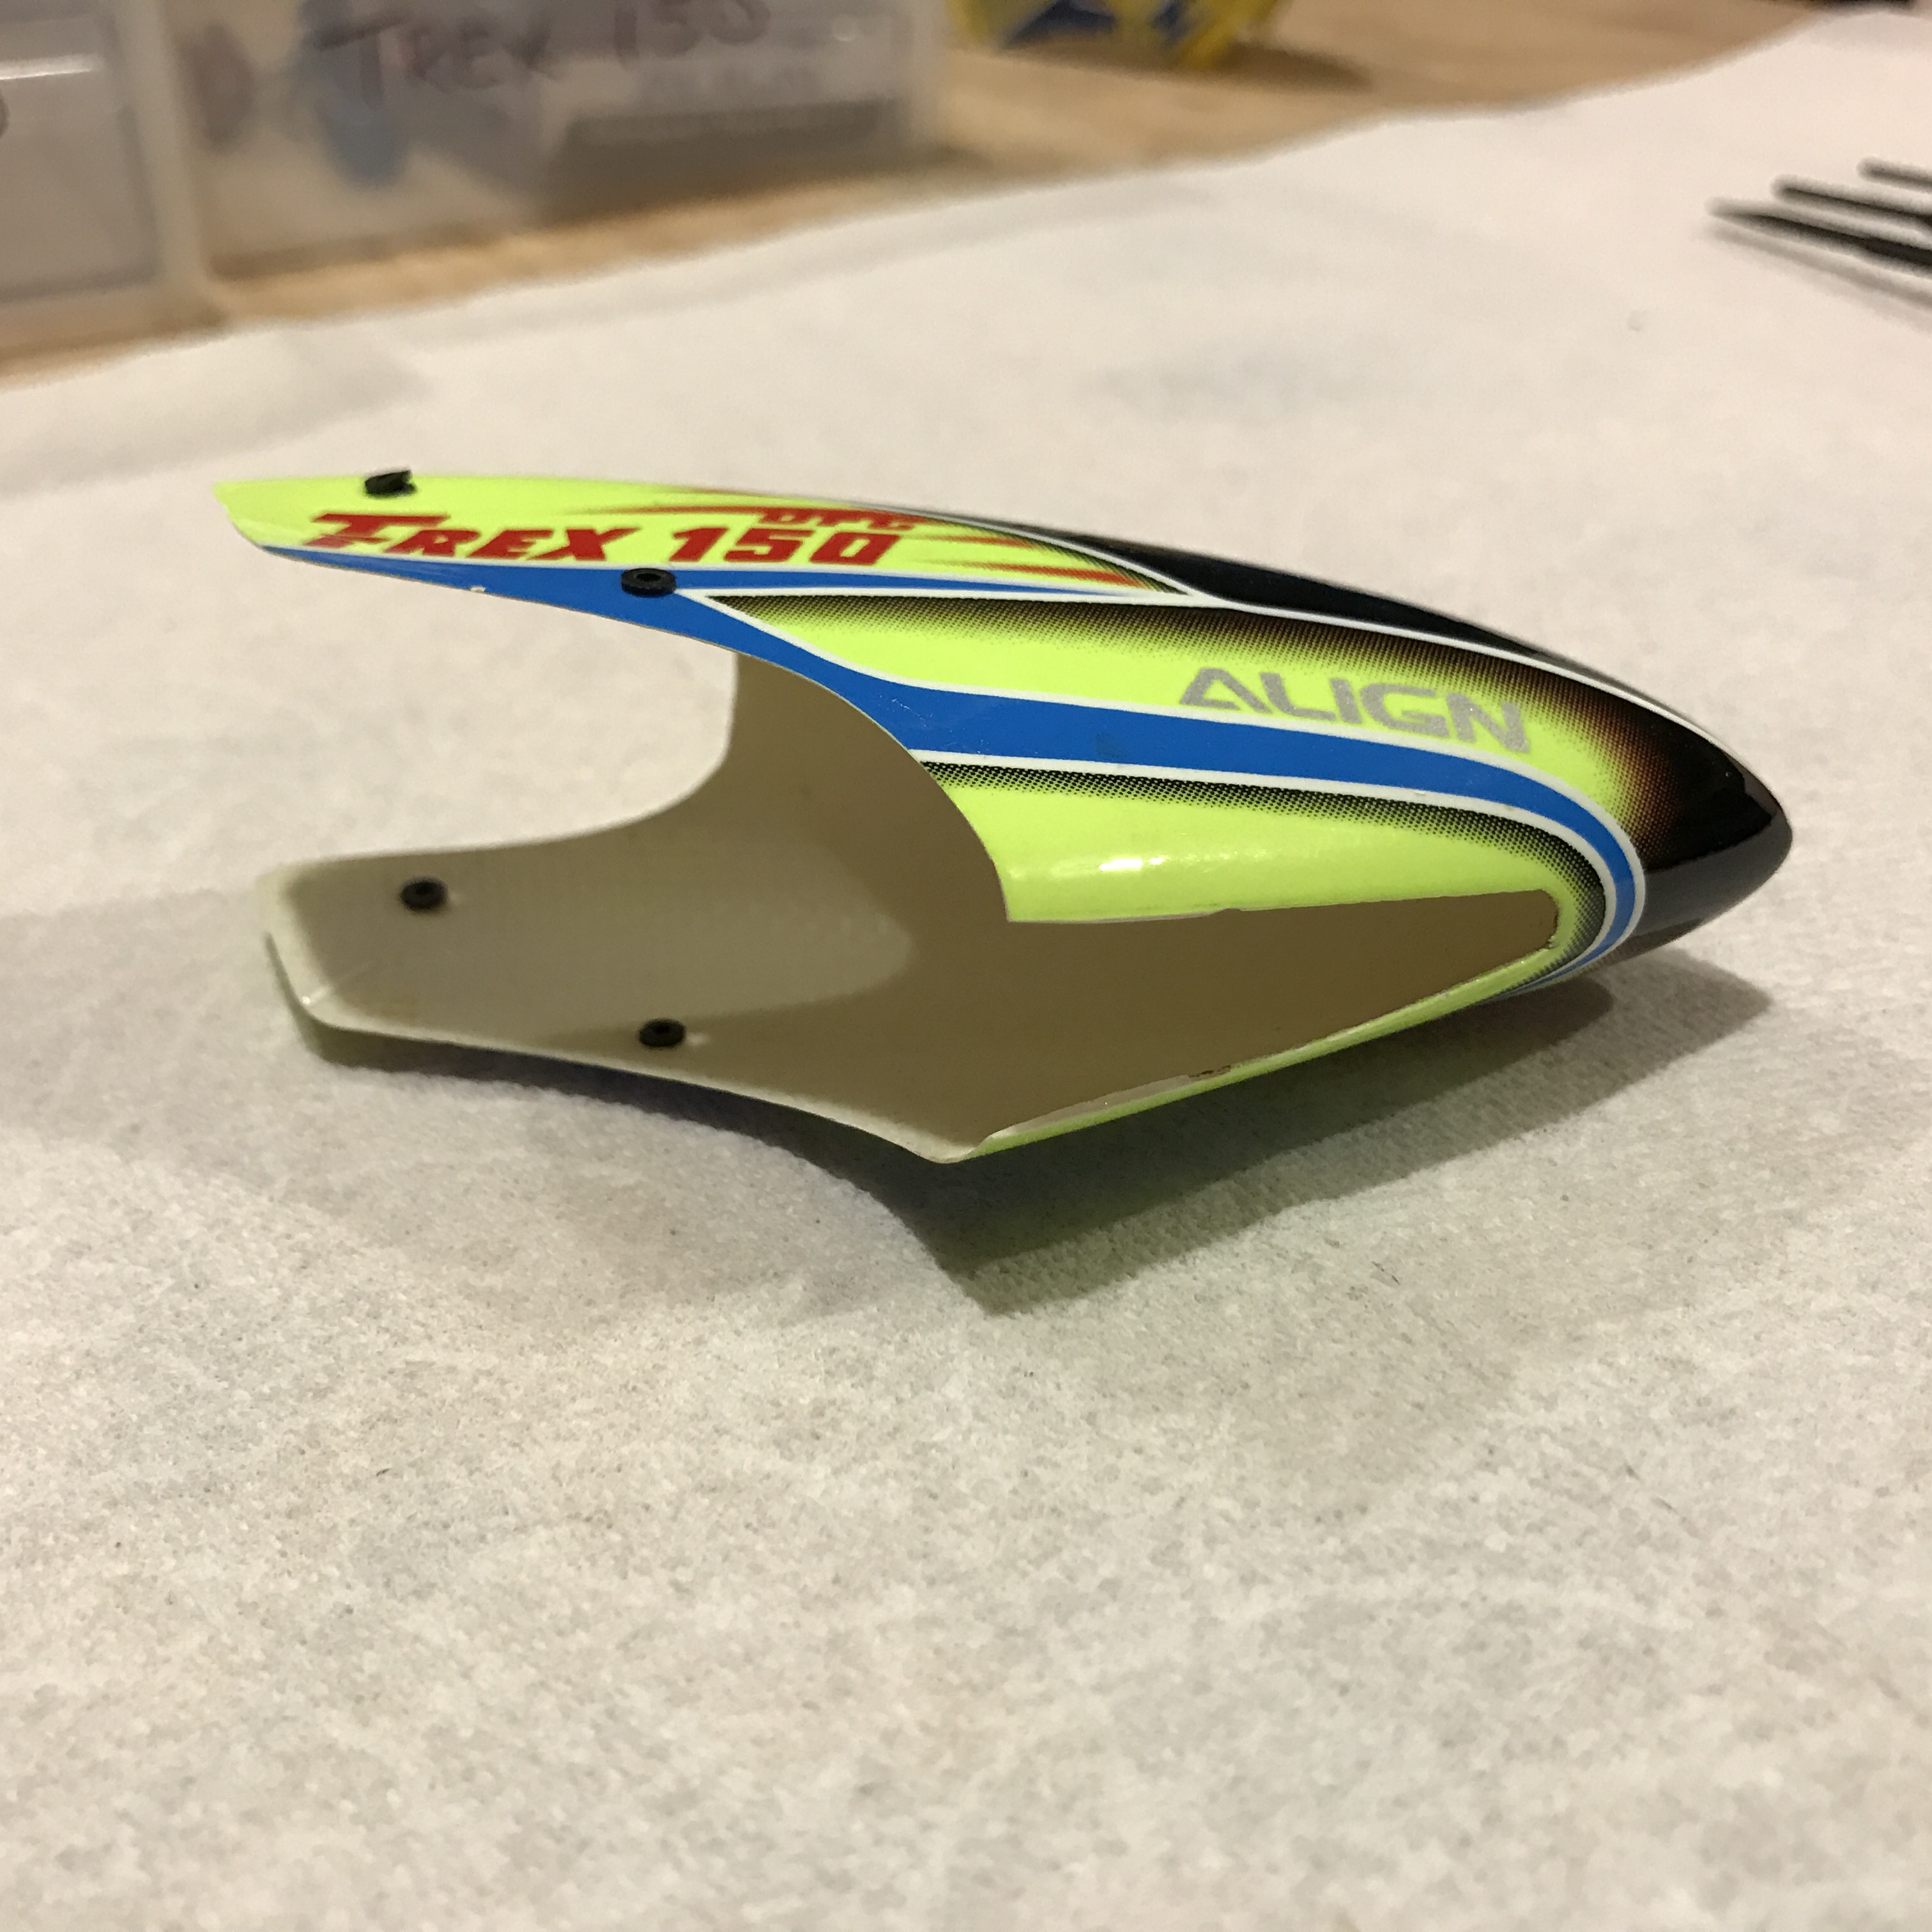
Use a straightedge and a hobby knife to score the plastic / fiberglass. Don’t try to cut all the way through the material in a single cut. Continue cutting in light passes until you’ve gone all the way through the material. This modification also makes the stock fiberglass canopy easier to install - it is nearly impossible to install the unmodified canopy without damaging the gelcoat.
If you have a canopy that fits properly to begin with, or you don’t want to start cutting into a brand-new purchase, an alternative approach is to use a nonconductive object to provide pressure on the back of the battery connector while installing a battery:
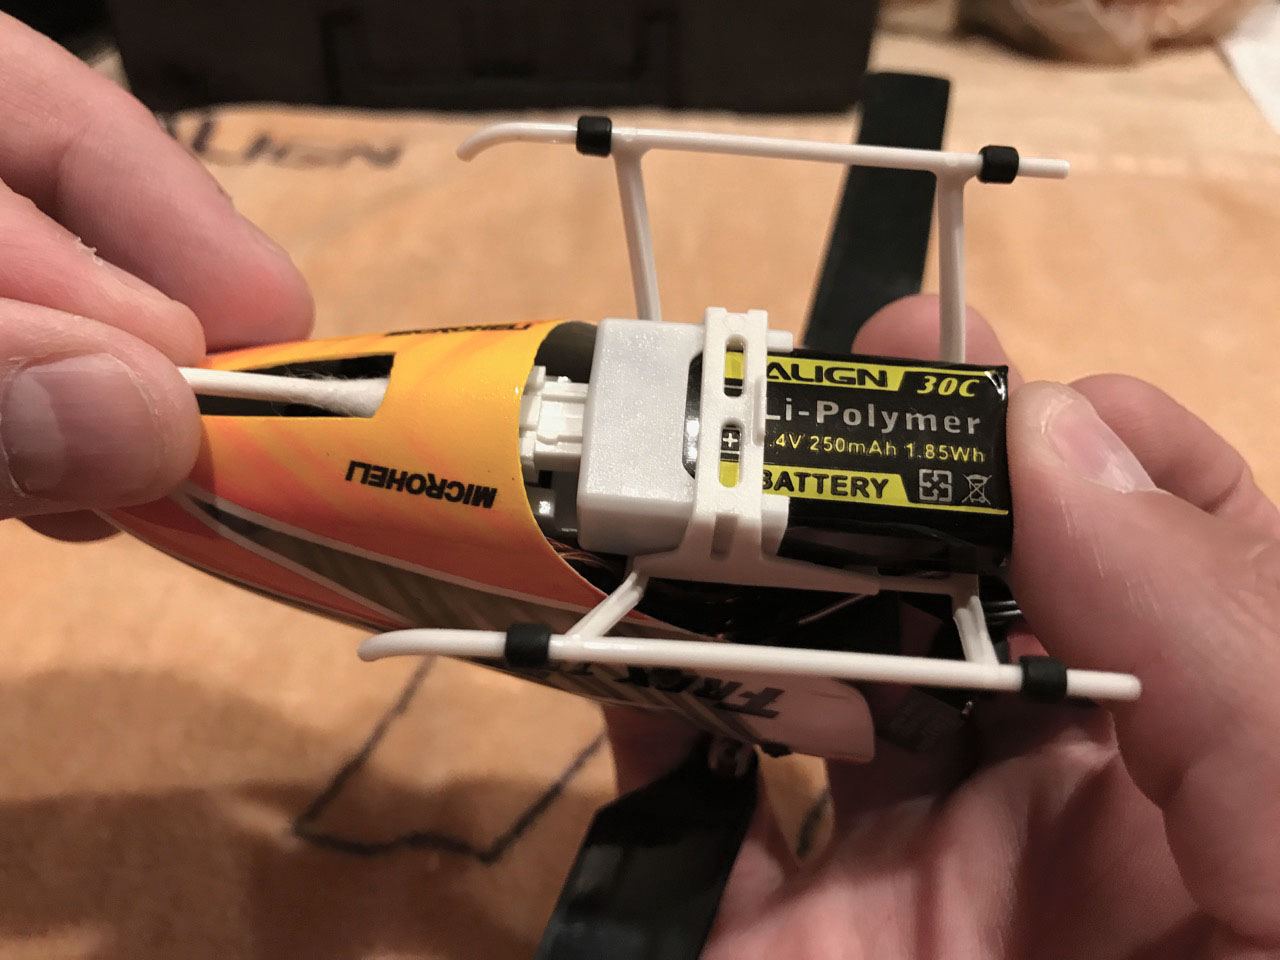
WARNING - if you use this approach, be very, very sure that the object you use is nonconductive, since it will be touching the wires on the back of the connector, which are energized as soon as the battery is inserted:
… I like using Q-tips for this purpose, since I already have them among my hobby tools, and they can put sufficient gentle pressure on the back of the connector without damaging anything.